There are millions of ways you can alter your dressing style and become to center of attraction in the crowd. One of the most trendy and distinctive ways to do so is by using a custom patch. In recent times, custom patches have become a highly favored and preferred option for fashion enthusiasts because of their versatility.
Before you set out to design your custom patch, you must clearly understand what message you want to communicate with the patch. Whether it is an occasion you are celebrating or if it is for commercial marketing of your organization? Questions like these would help you decide the design, color combination, and material used in making these custom patches.
We understand that you still have a lot of questions in your mind and would like to know all there is about a custom patch. We have created this write-up to help you get answers to all your questions about custom patches. All you need to do is just sit back and peruse the coming sections.
What Are Custom Patches?
Custom patches are the pieces of cloth created with a distinctive design that reflects the brand or purpose of the aforementioned patch. Basically, these patches are made as per the clients' requirements and hence are termed as "custom patches."
Using custom patches is a unique way to stand out in a crowd and is commonly used in schools, clubs, businesses, etc. These are basically created to add a style statement, send a message, or create awareness through customizing your attires with patches. It is possible to create any type of design for your custom patch.
Types of Custom patches
There are four significant types of custom patches that you can get manufactured:
Embroidered patches
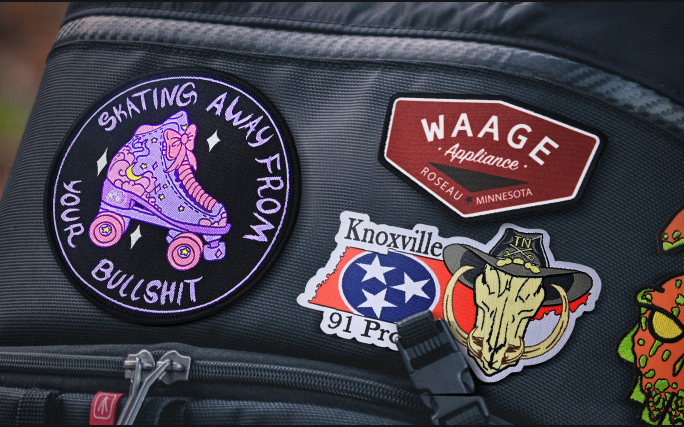
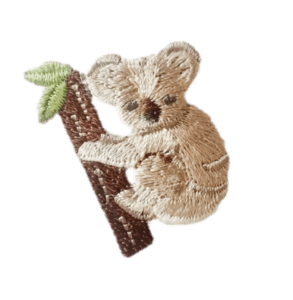
These are one of the most popular types of custom patches. Embroidered patches are highly favored on account of them being very affordable, fancy, and durable. Numerous thread color options can be chosen to match your logo, text, or any specific image.
A distinctive feature about the embroidered patches is that once created, they make the patch pop off from the base and appear more pronounced. Making embroidered patches is easy and can be delivered to you in a short span. These patches are commonly used on hats, bags, or clothes.
Printed patches
These are also popularly known as "Sublimation." When making a printed custom patch, a printer is used to transfer the dye into materials (such as cotton, twill, or satin) by using heat. It is the same technique used to do printing on common-wear t-shirts. The significant advantage of using this method for your custom patches is that there is no limit to the color options, print size, and washable.
The printed patches are suitable for those looking to get a volume of custom patchwork done quickly and at a reduced cost. Printed patches are commonly used to print photographs or texts on the fabrics.

Sequin patches
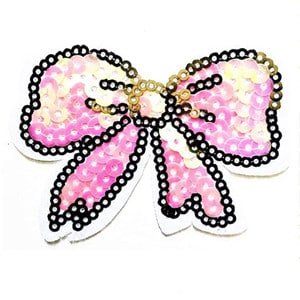
Sequin is unique custom patches commonly used to enhance the beauty of t-shirts, bags, varsity jackets, and notebooks. You can also avail of reversible color-changing sequin patches, which are popular amongst females and children. You can find various types of sequin patches at brand stores of GAP, Gucci, or Zara.
Chenille patches
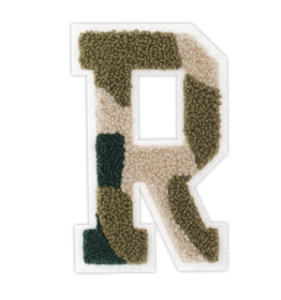
These are the traditional or old-school custom patches that are still favored by many. Chenille patches have two layers, and the top is furry, whereas the bottom is flat. Combining chenille and embroidery is a great way to be creative with your custom log. You must have commonly seen them on sweaters or varsity jackets.
How to Design Your Custom Patch?
It is effortless to design your custom patch regardless of the purpose or usage. Whether you need it for corporate events, social clubs, school, or merely to refresh the look of your attires, designing a custom logo is a simple process. To make it easier for you, we have listed the steps to help you with the custom patch designing process.
Step 1: Start with An Idea
The very first thing you need to do is brainstorming to get ideas for your custom patch. Decide what the purpose of the custom patch is, what ticks you, and if required, get inspiration from the patches you have already seen before. Using online social media platforms also proves to be inspiring and might help get you started.
You can use the traditional pen and paper and start doodling or use your computers to create a rough sketch. It is crucial to scribble since ideas are generated when your hands are at work, and your brain is active. Once you have fixated on the idea, move to the next step.
Step 2: Decide on The Type of The Custom Patch You Want
We have already discussed the four types of patches available, and now would be time to choose which style would suit your requirement. You can select from Embroidery patches, Sequin patches, Printed patches, or Chenille patches.
Step 3: Determine the Size of Custom Patch
It is essential that you also decide what size of the patch you are looking for? If it is just to put on a sleeve, then a medium-sized patch would suffice. However, if you look to put patches covering the front or back of a large-sized attire, you need to choose the size accordingly.
Step 4: Choose the Patch Border
Next, you need to choose the border of your patch. You can choose from the following based on your needs:
- Hot Cut Border: If you have decided to get patches with complex outer cut lines or edges, then a hot cut border is the best option since these are done using a laser machine or hand-made.
- Merrowed Border Option: If you are concerned about threads fraying away from the border, then consider getting a merrowed border.
- Fray Border Option: You may choose this one if you prefer a furry look at the borders of your patch.
Step 5: Choose the Patch Backing
There are various options when it comes to choosing the backing of your patch. Here is the list from which you can select as per your requirement:
- Sew-on patches backing (without glue)
- Iron-on patches backing
- Peel and stick backing
- Velcro backing – one piece
- Velcro backing – two-piece
- Pin backing
Step 6: Choose the Patch Package
Here is the list of options for the patch package:
- Bulk pack
- Barcode
- Single patch card
- Hang tabs
- Clip strip
Concluding Thoughts
Getting a custom patch for your requirement is a tedious job. However, if proper guidance is available, it becomes a manageable and smoother process. Hopefully, this guide helped you gain valuable insight about the custom patches and aids you in getting your next batch of custom patches.