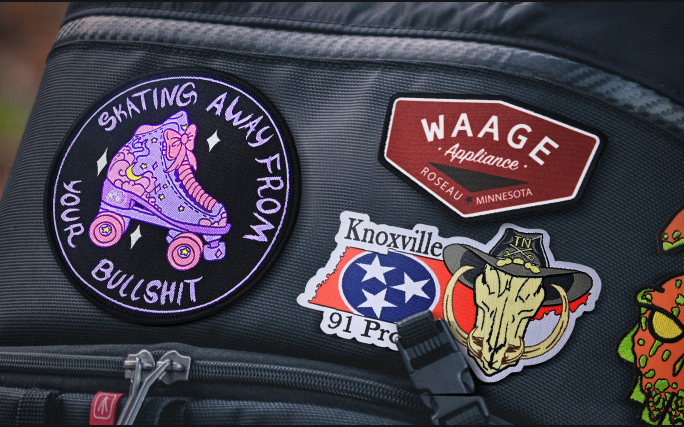
Many people love customizing their clothes, bags, and accessories, but traditional patches can be a hassle. They require sewing, ironing, or gluing, which takes time and effort.
A sticker patch is a peel-and-stick fabric patch with an adhesive backing. It requires no tools, applies instantly, and leaves no residue when removed.

Sticker patches are gaining popularity because they offer convenience and versatility. They work on different surfaces, making them perfect for quick, stylish decoration.
How do you apply a sticker patch?
Applying a patch should be simple. Many people avoid patches because they think they need an iron or sewing skills. But with sticker patches1, it’s much easier.
To apply a sticker patch, peel off the backing, place it on a clean surface, and press firmly. It sticks instantly without any tools.

Best practices for a strong bond
Applying a sticker patch is easy, but a few steps can improve its grip and longevity. Here’s how I make sure my patches stay put:
-
Choose the right surface
Sticker patches work best on smooth, dry surfaces. Clean the area with a cloth to remove dust, oils, or moisture. Rough or textured surfaces may weaken adhesion. -
Peel carefully
Slowly remove the backing without touching the adhesive. Fingerprints or dirt can reduce stickiness. -
Press firmly
Smooth the patch onto the surface with even pressure. I often press with my fingers for smaller patches or use the palm of my hand for larger ones. -
Wait before washing
While sticker patches can survive light hand washing, I recommend waiting 24 hours before getting them wet. This allows the adhesive to fully bond.
Where sticker patches stick best
| Surface | Adhesion Strength | Notes |
|---|---|---|
| Fabric (cotton, denim) | Medium | Good for temporary designs, but not as strong as iron-on patches |
| Laptops, phones | High | Sticks well and removes easily without damage |
| Leather, vinyl | Medium | Works best on smooth, non-oily surfaces |
| Plastic, wood | High | Ideal for decorating hard surfaces like notebooks and furniture |
| Shoes, hats | Medium | Withstands light washing, but avoid heavy scrubbing |
From my experience, sticker patches last longer on firm surfaces like laptops, books, or backpacks. If applied correctly, they can even survive a few hand washes on fabric items.
How do you remove sticker patches?
One concern I often hear is whether sticker patches leave behind sticky marks. People want a quick way to remove them without damaging their belongings.
To remove a sticker patch, gently lift one edge and peel it away slowly. It usually leaves no residue, but any remaining adhesive can be wiped off.
Easy removal without damage
Sticker patches are designed for easy application and removal. Here’s how I remove them cleanly:
-
Peel slowly from one corner
I start at an edge and gently pull back. Ripping too fast might stretch the patch or leave glue behind. -
Use heat for stubborn patches
If a patch has been on for a long time, I warm it slightly with my hand or a hairdryer. The heat softens the adhesive, making removal easier. -
Clean any residue
If there’s leftover adhesive, I wipe it with a damp cloth or rubbing alcohol. This works well for surfaces like plastic, metal, or glass. -
Store for reuse (if possible)
Some patches can be reused. If the adhesive is still sticky, I place the patch on wax paper for storage.
Can you reuse sticker patches?
| Condition | Reuse Possible? | Notes |
|---|---|---|
| Applied on fabric | No | Adhesive weakens after washing |
| Applied on hard surfaces | Maybe | Depends on how long it was stuck |
| Removed carefully | Yes | Best chance of reuse if stored properly |
I love how sticker patches allow me to change designs whenever I want. I swap them on my laptop or backpack without worrying about residue or damage.
Where is better to use sticker patches instead of iron-on patches?
Iron-on patches2 are great for permanent designs on fabric, but they don’t work everywhere. Sticker patches offer more flexibility.
Sticker patches are better for surfaces that can’t handle heat, like electronics, plastic, or leather. They also work well on accessories like hats, shoes, and backpacks.

Choosing the right patch for the right item
I’ve worked with both sticker and iron-on patches, and each has its strengths. Here’s how they compare:
| Item | Sticker Patch | Iron-On Patch | Best Choice |
|---|---|---|---|
| T-Shirts | ✅ Temporary | ✅ Permanent | Iron-On |
| Laptops | ✅ Yes | ❌ No | Sticker Patch |
| Shoes | ✅ Yes | ✅ Yes | Sticker Patch |
| Denim Jackets | ✅ Temporary | ✅ Strong hold | Iron-On |
| Backpacks | ✅ Yes | ✅ Needs heat | Sticker Patch |
| Hats | ✅ Yes | ✅ Needs heat | Sticker Patch |
I personally love using sticker patches on items that I want to customize temporarily. For example, I put them on my kids' school bags so they can change designs as they grow. On hats, sticker patches are perfect because they don't require heat, which could ruin certain materials.
One of the biggest advantages of sticker patches is their removability. If I change my mind or want a fresh design, I can peel them off. This is impossible with iron-on patches, which become permanent after application.
Another reason I choose sticker patches is convenience. There’s no need for an iron, which makes them ideal for travel or quick customization. I’ve decorated notebooks, lamps, and even phone cases with sticker patches.
Conclusion
Sticker patches provide an easy, mess-free way to personalize items. They are perfect for non-fabric surfaces and offer flexibility that iron-on patches don’t.


